iOS Pentesting Guide From A N00bs Perspective 2

Hello Guys,
So in my last blog I showed you guys to set up the iOS devices to start your journey in testing iOS Applications. I have also written a simple script that will automatically do the job of installing basic packages on your iPhone and help you start your journey in testing iOS Applications, you can find it on my Github. If you have not read my previous blog then you can read it on ios-pentesing-guide-from-a-n00bs-perspective.1. This will be a multipart blog series where I will be demostrating how to check for different misconfigurations & vulnerabilities that might be present in an application. In this blog I will be covering reading unencrypted Local Data Storage and bypassing Jailbreak detection.
Tl;dr
So once you have everything ready, Lets start with our target application. We will be using "DIVA-v2-swift" for demostartion purposes, you can download it from Github. I have choosen this application as there are not many solutions available on internet. This way I will also have to put in extra efforts to solve evry challenge. Also, I will show different techniques of for solving a challenge too.
I will be using iPhone 5s with iOS 12.4.8 for this whole blog series. We will need to start Frida Server on the iPhone. If you dont have frida server then you can get instruction for installing it in my previous blog .
Local Data Storage
Plist
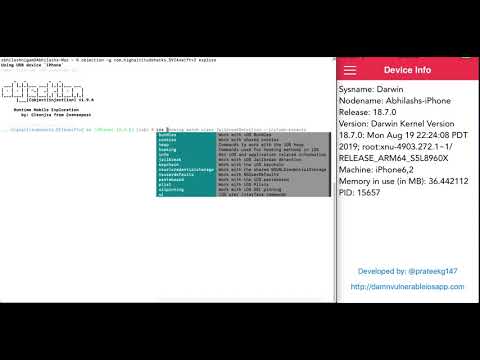
- We will start objection using the command
objection -g com.highaltitudehacks.DVIAswiftv2 explore
- We will see all the directories used by this application by typing the command
env. - We will then navigate to the our Plist challenge from
≡ > Local Data Storage. - We will then enter the required details and click on "Save in the Plist file" option.
- We will now navigate to the "Document" directory of the application, to check if the application has created any files.
- We see that there is a "userInfo.plist" present.
- To read the content of the file we need the below command
ios plist cat userInfo.plist
- Voilà!! We have what we saved.

NSUserDefaults
- As hooking objection to DVIA-v2 and getting environment varables for the application is same as mentioned above I will not be mentioning it again and again.
- We will now navigate to the our NSUSerDefault challenge from
≡ > Local Data Storage. - We will fill the required field and click on "Save in the NSUSerDefault" option.
- To see our saved data we now move back to our hooked objection terminal and type the following command
ios nsuserdefaults get
- Voilà!! We have what we saved.
Keychain
- We will now navigate to the our Keychain challenge from
≡ > Local Data Storage. - We will fill the required field and click on "Save in the Keychain" option.
- To see our saved data we now move back to our hooked objection terminal and type the following command
ios keychain dump
- Voilà!! We have what we saved.

Realm
- We will now navigate to the our Realm challenge from
≡ > Local Data Storage. - We will fill the required field and click on "Save in the Realm database" option.
- For viewing Realm databse we need Realm Browser. We can download Realm Browser from MacOs from official site.
- The Realm data base is created in the Documents directory. We can get the path using objection (shown when reading Plist file).We will now copy the Realm file from the iDevice to the laptop using the below command:
scp root@<ip>:/var/mobile/Containers/Data/Application/<Bundle Id>/Documents/default.realm .
- Once we have copied the Realm file we will open it via Realm browser.
- Voilà!! We have what we saved.

CoreData, Couchbase & Yap Database
- All the three databases can be read using a single utility i.e. SQlite3. I will be demosatrating Coredata and the same technique can used to read data from other databases.
- The challenge you can face is finding the database files. A simpliar way to find the database files is using the find command. We need to navigate to application folder and type the following command.
    #SQlite Database
    find . -name *.sqlite3

    #Couchbase Lite Database
    find . -name *.cblite2
- We will now navigate to the our Core Data challenge from
≡ > Local Data Storage. - We will fill the required field and click on "Save in the Core Data" option.
- Now SSH into the device and find the SQlite database and then find the required database unsing the find command as shown above.
- Open the database using the Sqlite utility using the below command
sqlite3 Model.sqlite
- Some sql queries in sqlite3 are different that a regular DBMS. You can read in detail in official site or you could use
.helponce you are inside the SQlite cli DBMS. - In order view all the tables and view data saved in them we need to run below commands
    #To view tables
    .tables

    #To view in the tuples in a table
    select * from ZUSER;
- Voilà!! We have what we saved.

Jailbreak Bypass
There are multiple methods to bypass jailbreak the most common method of all is using LibertyLite tool. If you have used my script to setup your iOS Device then it will be installed already.
- We will now navigate to the our Jailbreak Detection challenge from
≡ > Jailbreak Detection. - We will then check all detection techniques by clicking on the links to confirm that our device is jailbroken.
- To bypass this we will open
Settings App > Liberty > Block Jailbreak Detectionand enable the bypass for DVIA-v2. - Navigate back to the application and check again for jailbreak status.
- Voilà!! We successfully bypassed jailbreak detection.

We can also do the same using objection. To bypass using this technique follow the below steps
- We will now navigate to the our Jailbreak Detection challenge from
≡ > Jailbreak Detection. - We will then check all detection techniques by clicking on the links to confirm that our device is jailbroken.
- We will now start
objectionand type the command
ios jailbreak disable
- Voilà!! We successfully bypassed jailbreak detection.
We also have another method using objection i.e. manually. This technique is easy if we have classes or methods written in ObjectiveC. If we have classes or methods written in Swift then the hooking process becomes more complicated. I will be showing you the objectiveC method in this blog and for demonstarting Swift technique I will write a separate dedicated blog on it, as it lengthy and complicated.
- Start DVIA-v2 as shown before and search for classes containing keyword jailbreak. We can do this by running the below command.
ios hooking search classes jailbreak
- We found 2 classes:
JailbreakDetectionDVIA_v2.JailbreakDetectionViewController

- Now we will list all the methods used in the classes we found in last step by running the below command.
    ios hooking list class_methods JailbreakDetection
    ios hooking list class_methods DVIA_v2.JailbreakDetectionViewController
- We found 14 methods in total listed below
- menuTapped:- readArticleTapped:- jailbreakTest1Tapped:- jailbreakTest2Tapped:- jailbreakTest3Tapped:- jailbreakTest4Tapped:- jailbreakTest5Tapped:- initWithCoder:- .cxx_destruct- initWithNibName:bundle:- viewWillAppear:- viewDidLoad- prepareForSegue:sender:+ isJailbroken
- The plus(+) and minus(-) symbol before the method name denotes the return value of the method. A plus(+) means that this is a class method that returns a BOOL type. A minus(-) sign would mean that this is an instance method.

- In objection we can set the return value of a boolean method. We have only one class that returns a BOOL value and i.e.
+ isJailbrokenmethod. - But before setting the return value we need to know when is the function being called.

- To check when a method is being called we need to run the below command.The method needs to be written in the following format
<Return Type>[Classname Methodname].
ios hooking watch method "+[JailbreakDetection isJailbroken]" --dump-args --dump-return

- Once we have started our watch on the method we will now move onto the device and navigate to the our Jailbreak Detection challenge from
≡ > Jailbreak Detectionand see which of the challenge triggers our watch function. - We notice that Jailbreak test 2 triggers
+ isJailbrokenmethod. We also see that the Return Value of the function is 0x1 which is nothing butTrue. - Also notice the popup on the device which detects that the device is Jailbroken.
- We now set the return value to 0x0 which is
Falseto bypass the detection. We can do this by running the below command and select the same challenge again to see if we have bypassed the detection.
ios hooking set return_value "+[JailbreakDetection isJailbroken]" false
- Voilà!! We successfully bypassed jailbreak detection.

This conclue the part 2 of this series. I will be back with more.